Time has a way of poking holes in things. Of course, some things come with holes already in them, as is the case with the original Tempest CP we have for the Cowboy Arcade project.
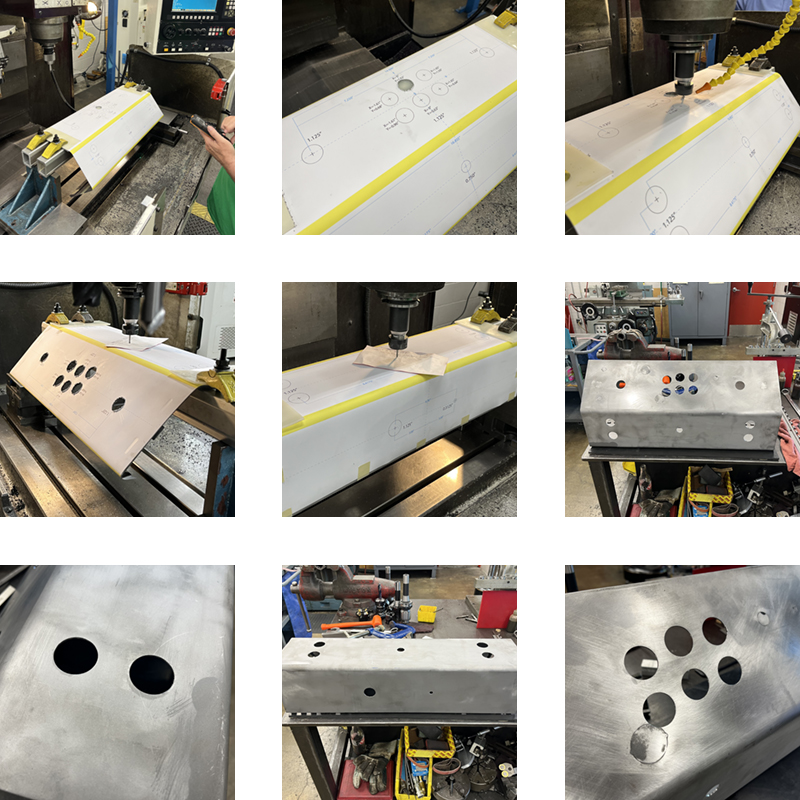
It’s time to patch the holes and make new ones (shown in orange) for the redesigned controls. First we stripped the old overlay off, cleaned the sticky off with Pro Goof Off, and then sandblasted the metal clean.
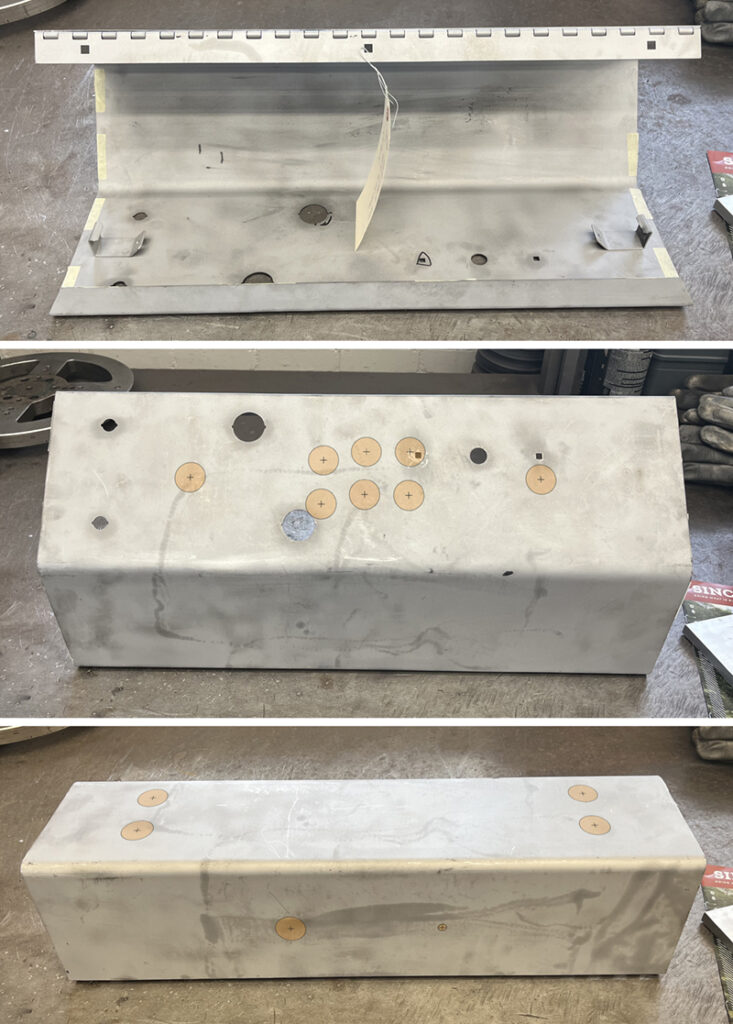
Luckily, one of the new buttons completely eclipses one of the old bolt holes, and another one barely kisses the edge of one of the old button holes. Next we Wire EDM cut pieces to exactly match the holes.
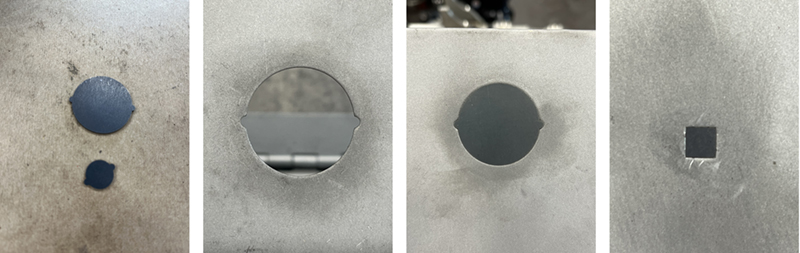
Next we will tack weld them in place with a TIG welder being VERY careful not to get the surrounding metal hot and cause it to warp or pucker. Welding from the back caused a slightly raised dimple on the front which we can grind down completely flat.
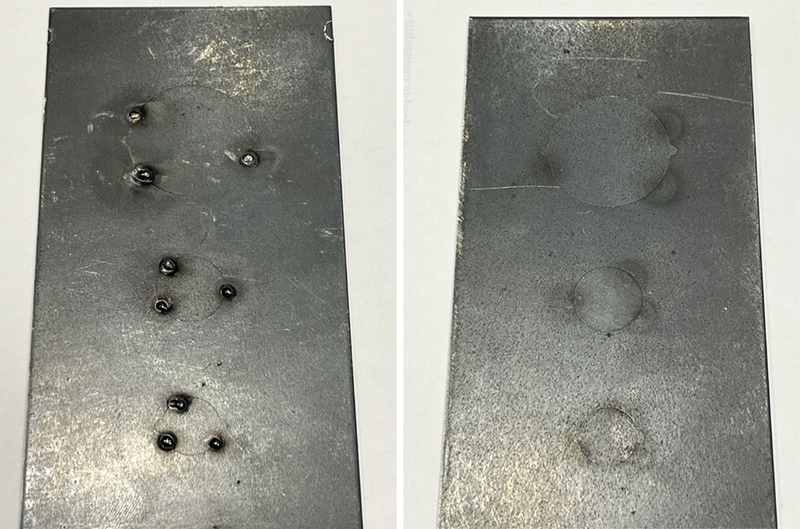
Left is back with the spot welds – Right is front which is remarkably smooth
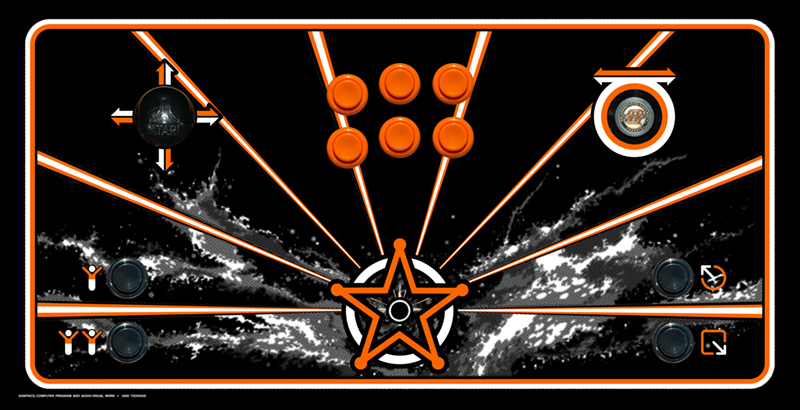
Then it was time to add back the holes we need for the new controls. Using the original art from a Tempest CP, we layed out single player controls on the player control panel, admin buttons on the front facing panel, and USB ports and volume control on the down facing panel:
We printed out the hole layout with yellow bars where the bends in the CP are and hole sizes and dimensions from a centered x,y coordinate grid:
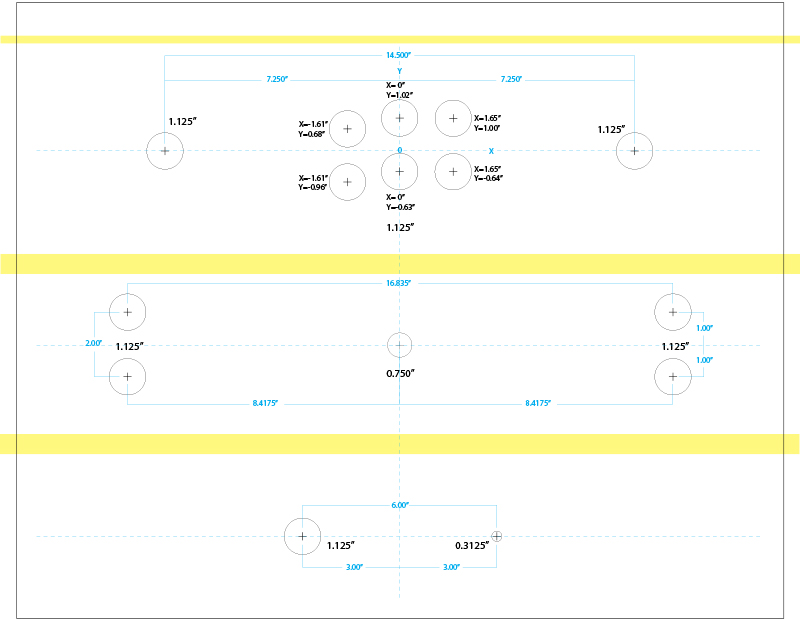
Then we taped this onto the CP before clamping it into a CNC mill to cut the holes with an endmill. The result was perfectly positioned holes that are very clean:
The original CP had 2 game play buttons and 2 player select buttons that mounted normally, plus a spinner that was bolted onto the back of the CP with carriage bolts through the CP from the front. We don’t want any bolts on the front, so we have to create mounts for the spinner and the joystick. Also, we are reusing the controls from the original Cowboy Arcade, which has a 3/4″ wood CP, so we have to mount the controls on standoffs so they come through the CP at the right depth. We came up with an idea to use the hole for the spinner and joystick as the reference for the standoffs as well as the clamp. We made a fixture and machined the standoffs:

Then we used JB Weld to affix the standoffs to the back of the CP. The fixture above let us screw the standoffs onto the plate and then use a button to hold it in place and apply pressure while the JB Weld cures locating the standoffs accurately.
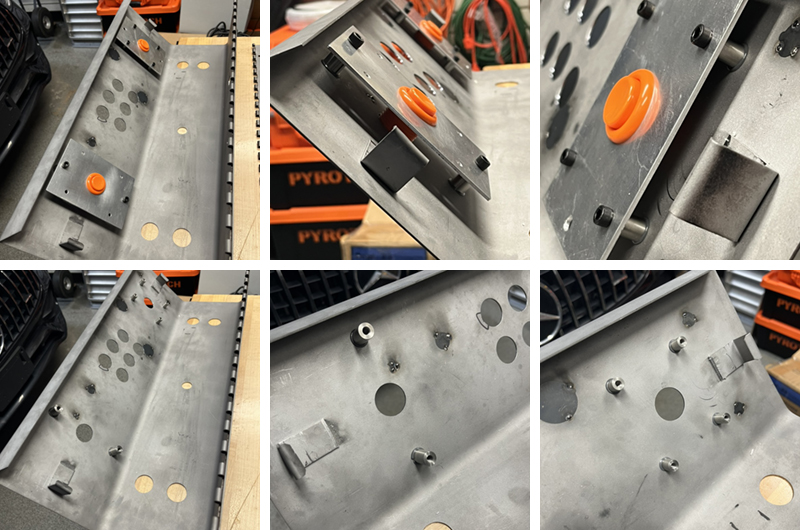
The JB Weld sets up to a tensile strength of 5020 PSI in 24 hours. With two 1/2″ standoffs on the spinner that’s about 2000 lbs of force it can withstand. With four 3/8″ standoffs on the joystick that’s also about 2000 lbs of force it can withstand. The JB Weld is good to 550°F and the powder coating cure temp is only 400°F, so it will stand up to being powder coated also.
Leave a Reply
You must be logged in to post a comment.